Powered By Blogger

Tuesday, October 7, 2008

How to Format a Computer with Windows 95, 98, or ME


To reinstall Windows, you will need a Startup Diskette and a Windows Installation CD

digital-media-data-recovery-softwareDownload the Startup Diskette Creator

Note: We recommend using the Startup Diskette available on this page. Other Windows Startup Diskettes may not work with the following steps.
  1. Once you have your Startup Diskette, insert it into the floppy drive and restart your computer.

  2. Select option #1 - Start the computer with CD-ROM support.

  3. After a minute or so, you will see "A:>_".

  4. Type "fdisk" and press Enter.

  5. If asked to enable large disk support, select Y for Yes. (Note: Some versions of Windows 95 may not be compatible with large disk support. Select N here if it does not support the FAT32 file system.)

  6. Select Option #1 - Create DOS partition or Logical DOS Drive.

  7. Select Option #1 - Create Primary DOS Partition.

  8. The drive integrity will be verified.

  9. Unless you are planning to make multiple partitions, select Y when asked if you want to use the maximum available size for the partition and to make the partition active.

  10. The drive integrity will be verified again.

  11. When completed press the Esc key to exit fdisk.

  12. Without removing the floppy disk, press the reset button on the computer or press the keys Ctrl then Alt then Delete and release them together. This will restart the computer.

  13. Again, select the option to Start the computer with CD-ROM support.

  14. When you see A:>, directly above it is a message about your CD-ROM drive. It will tell you the letter assigned to your CD-ROM drive, take note of it. 

  15. At the A:>, type "format C:" and press Enter.

  16. Press the Y key then the enter key when asked if you want to proceed with the format.

  17. The format will probably take some time, so be patient.

  18. You will be asked to choose a Volume Label, which is a name for your hard drive. It has no effect on the operation of your computer, you may choose any name you like.
credit to: www.whitecanyon.com

Sunday, October 5, 2008

How Does an Anti-Virus Software Work? - The Inside Story

We all know about anti-virus software these days. I guess you have read my comparative study on anti-virus software too. If in case you haven't, here it is. While writing on that article I realized I have been rather superficial on the most important part of an anti-virus column and that is not WHAT cures the disease. Its about HOW they do it. Today let's find out how they actually work.

After a lot of study, I came to know about mainly four different algorithms used by today's anti-virus software to detect viruses:

  1. Generic Scanning Technique
  2. Integrity Checking Technique
  3. Heuristic Search Scanning
  4. Interception technique

None of them are individually perfect. However in combination they often prove to be a formidable opponent to any current viruses, trojans and more. Moreover some of the techniques also protect your computer against future viruses.

1. Generic Scanning Technique

Most of the old viruses and some new viruses and trojans have a recognizable pattern or signature (sequence of bytes) which anti-virus software looks for. Anti-virus software has a library of signature against which it matches the applications, boot sectors and other possible locations of infection. If it can detect a match it will then signal the end-user with the virus details and location where it was found. Anti-virus software's update these signatures at regular intervals. Unfortunately mutating and polymorphic viruses evade simple signature detection by continuously changing their code. They are detected by advanced techniques discussed below.

Advantages

Signature detection is simple and fast. Anti-virus software can look for virus signature in large number of files in a very short period of time. This is what makes it a popular option with anti-virus vendors.

Disadvantages

Virus creators today mostly code polymorphic viruses which changes the code, while retaining the functionality, thereby evading signature detection algorithm. There are virus toolkits available for free which allows even a script-kiddie to code a polymorphic virus with minimal expertise. This can be a useful technique only in conjunction with other techniques but not alone. It is in some ways similar to comment spam detection or email spam detection using keyword matching for typical spam words like viagra.

2. Integrity Checking Technique

Some anti-virus softwares can maintain a log file about important files under Windows. The integrity information of those files are stored in their database and are recorded by check-summing. If a virus tries to modify a system file, the anti-virus software at once notifies the user by this technique.

The best part of this technique is, even if a system file gets corrupt (weirdly as it does sometimes without the initiative of Mr. virus) suddenly and tries to change and modify the boot sectors or say registry, the integrity of the files will be violated and the anti-virus will warn the user about that too.

Advantages

  • The integrity checking technique perhaps is the most foolproof of them all, as it can determine if a file has been damaged by a virus or not.

Disadvantages

  • The problem with this is, not many softwares can implement such precise and perfect technique. A data loss or a damage due to corruption can not be distinguished with a case where the file is damaged by a virus. But, there is a boon in the bane. Not any harmful activities within your computer gets unnoticed.

3. Heuristic Scanning

Heuristic Scanning follows the behavioral pattern of a virus and has different set of rule for different viruses. If any file is observed to be following that set of particular activities then it infers that the particular file is infected. The most advanced part of Heuristic Scanning is that it can work against highly randomized polymorphic viruses too. Heuristic scanning technique has the potential to detect any future virus with ease. F-Secure Anti-virus quite successfully implements this technique.

Advantages

  • The advantage of this scanning is that, its very it has the prospect of being the only algorithm of all the anti-virus softwares in the future because it can lead us to very accurate virus detection if properly coded.
  • It doesn't need anti-viruses to download weekly virus database because it can detect viruses from behavioral pattern from the set of rules.
  • Disadvantages:

  • Te disadvantages of heuristic search techniques are that they are very complex to implement.
  • And again, a virus coder can make a virus that will not obey the set of rules a heuristic scanner hopes it will. Then the virus will be infecting without being noticed.
  • Again, chances of false alarms are more with heuristic search techniques.

4. Interception Technique

This is the newest technique which continuously monitors your files for suspicious activities.

Imagine if a virus is hidden in a CD-ROM. Then how on earth would other anti-viruses come to know about it? But interceptors watches all external drives, data devices as well as internet download or even file download from email. That is why it provides real-time protection to your computer. When a virus comes from a DVD or a pen drive, be rest assured that an anti-virus software that has implemented interception technique will detect it immediately and warn you about it. Most of them will prevent you from running infected programs too.

The key feature of an interceptor is that it has to be very fast to avoid degrading user experience. But most of the modern day anti-virus software implementing the technique do it fairly well like for example Nod 32. NAV was at one time known to slow down your computer due to sluggish performance in interception. I heard it has improved over the years.

Advantages

  • Gives your computer a Real Time Protection.
  • Any chance of a virus coming from an external drive (CD ROM, pen drive etc) is done away with.

Disadvantage

  • Interceptors can be very easily disabled if it is not very fast to react against threats and most of the viruses do so with perfection.
  • It is a nuisance for a fast and busy user as it keeps coming with logs and warning messages on trivial issues and that too very frequently.

Take home thoughts…

Thanks for reading so far. The two most important take home lessons are:

  1. A single anti-virus software may not offer full protection. You may be better protected with two (but not more) anti-virus software as your bases will be better covered. However their interception techniques may conflict. So you may be better off using the real-time scanning of only one of them.
  2. Update Keep the virus database file regularly, if possible daily. Many of today's of anti-virus software will do that automatically for you.

As you have reached the heart of the matter, you may want to take a look at this as well. A detailed free Windows anti-virus software here.


Credit to: http://blog.taragana.com 


How to Format a Computer with Windows XP


  1. To format a computer with Windows XP or 2000, insert Windows CD and restart your computer.

  2. Your computer should automatically boot from the CD to the Windows Setup Main Menu.

  3. At the Welcome to Setup page, press ENTER.

  4. Press F8 to accept the Windows XP Licensing Agreement.

  5. If an existing Windows XP installation is detected, you are prompted to repair it. To bypass the repair, press ESC.

  6. Use the ARROW keys to select the partition or the unpartitioned space where you want to create a new partition. Press D to delete an existing partition, or press C to create a new partition.

  7. Type the size in megabytes (MB) that you want to use for the new partition, and then press ENTER, or just press ENTER to create the partition with the maximum size.

  8. Select the format option that you want to use for the partition (Recommended: NTFS), and then press ENTER.

  9. After the Windows Setup program formats the partition, follow the instructions that appear on the screen to continue installing Windows.

Tuesday, September 30, 2008

Download Driver HERE!!!


Welcome to Opendrivers.com. Open Drivers focus on free driver download service and have a great archive of free drivers. Free download driver in Open Drivers has organized by device category and driver manufacturer. Each download driver includes an easy step-by-step process to install and unstall, add and delete, set up and remove driver. Driver categories include Audio and Soundcard, Camera and MP3 Player, Display and Video and Graphics, Input Device, CD-ROM and DVD-ROM, Modem, Monitor, Network, Printer, Scanner, Storage, PDA and Mobile, Multifunctional, Webcam, Notebook and Desktop computer etc. Driver manufacturer covers Canon, Nikon, Brother, Sharp, Panasonic, HP, Lexmark, Dell, Lenovo, 3Dlabs, Acer, AGFA, ASUS, BENQ, Casio, Epson, Fujifilm, Fujitsu, IBM, Kodak, NEC, Nokia, OKI, Olivetti, Olympus, Philips, Samsung, Sony, Toshiba, Xerox. In order to keep driver latest and updated, We update download driver archive day by day and maintain the full lists of all types of digital device drivers. We offer driver resources to help users install and remove drivers. Drivers for different operating systems, Windows 98 / 98SE / 2000 / XP / ME / Vista / NT and Mac OS and Linux and Unix, can be found in our driver databases.

Source : www.opendrivers.com

Monday, September 29, 2008

AntiVirus Comparison Research

Haiii everyone....
I have a long time search for the best antivirus.. and finally i found the latest comparison of antivirus below:-

avast! Professional Edition 4.8
AVG Anti-Virus 8.0
AVIRA AntiVir Premium 8.1
BitDefender Antivirus 11
eScan Anti-Virus 9.0
ESET NOD32 Anti-Virus 3.0
F-Secure Anti-Virus 2009
G DATA AntiVirusKit (AVK) 2009
Kaspersky Anti-Virus 2009
McAfee VirusScan Plus 12.1
Microsoft OneCare 2.5
Norman Antivirus & Anti-Spyware 7.1
Sophos Endpoint Protection 7.5.1
Symantec Norton Anti-Virus 2009
TrustPort Antivirus Workstation 2.8
VBA32 Scanner for Windows 3.12.8.2

All the result comparison you'll can see here or download here

All information i collect from this website http://www.av-comparatives.org/ 

IE 7.0 bypass genuine

How to Install Internet Explorer 7.0 Bypassing Genuine Windows Validation...

Internet Explorer 7.0 is the long awaited tabbed web browser by Microsoft. Nearly four years after the release of Internet Explorer 6.0, in the face of growing competition from Mozilla's Firefox, Microsoft has finally given the old IE platform a facelift. Optimized design along with new cool interface, favorites centre, search box, RSS feeds and most importantly easy to use tabbed browsing are the exclusive features of this new internet explorer.

You must have Windows XP Service Pack-2 (SP2) in order to install Internet Explorer 7.0. But still you will face a problem while installing this new Internet Explorer if your copy of Windows XP is not a genuine (non-pirated) one, since IE 7.0 installation requires genuine windows validation!!! So what to do??? Don’t worry… There are some tricky steps through which you can install IE 7.0 even in your pirated copy of windows XP bypassing the genuine windows validation. You just have to follow the following steps one by one:
  1. Download Internet Explorer 7.0 installer from the Microsoft site. You have to choose Windows XP Service Pack 2 (SP2) as your operating system. Remember you can’t install IE 7.0 if service pack 2.0 is not installed in your operating system. And if you are facing genuine windows validation problem while downloading IE7 installer from the Microsoft site, can also download this installer alternatively from here or directly from here.

  2. Extract the downloaded Internet Explorer setup file (IE7-WindowsXP-x86-enu.exe) using WinRAR to a directory (IE7-WindowsXP-x86-enu).

  3. Download the patched iecustom.dll and then copy-paste it to the update folder (IE7-WindowsXP-x86-enu\update\) and click yes when asked to overwrite.

  4. Now, download normaliz.exe . Then copy this exe file and paste it in your “c:\” drive.

  5. Run ‘update.exe’ in the update folder (not iesetup.exe!!!). At the end, you have to choose ‘Restart Later’ (not Restart Now) option to finish the running process of the exe file.

  6. Now you have to download normaliz.dll and then copy-paste it to “c:\windows\system32\” directory (in order to prevent problems with the file not being found after the installation). And then reboot/restart your pc.

  7. After rebooting your pc, you may face a problem with a file called normaliz.dll that can not be found by explorer.exe. If you’re having this problem, you will find your desktop blank.(If you are not facing this problem then just go to step 8) In order to fix this problem, you have to do the following things one by one:

    1. Press ctrl-alt-del to go to the task manager.
    2. Go to “File -> New Task (Run…)” in the task manager.
    3. Type: ‘C:\normaliz.exe’ (excluding quotation marks) in the ‘open’ field and then press the ‘ok’ button.
    4. WinZip Self-Extractor - normalize.exe’ window should popped up and then press the ‘unzip’ button.
    5. Reboot your pc and yahoo!!! now you can see your desktop contents!!!.

  8. Now you have to run ‘xmllitesetup.exe’ in the update folder. This step is very important, because somehow if you forget to run this ‘xmllitesetup.exe’ , IE 7.0 will be installed in your PC without it's toolbar!!!

  9. Then reboot your pc again, run Internet Explorer…and you are done!!!

Sunday, September 28, 2008

Install Windows Media Player 11.0 Bypass Genuine

How to Install Windows Media Player 11.0 Bypassing Genuine Windows Validation...

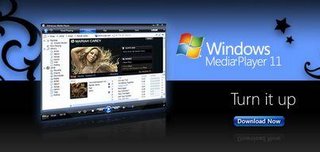
Windows Media Player 11.0 is the latest Media Player by Microsoft. It offers great new ways to store and enjoy all your music, video and pictures along with its new cool look. You must have Windows XP Service Pack-2 (SP2) in order to install Windows Media Player 11.0. But still you will face a problem while installing this new Windows Media Player if your copy of Windows XP is not a genuine (non-pirated) one, since WMP 11.0 installation requires genuine windows validation!!!


But there are some tricky steps through which you can install WMP 11.0 even in your pirated copy of windows XP bypassing the genuine windows validation. You just have to follow the following steps one by one:
  1. Download Windows Media Player 11.0 (make sure its the final and latest version, not beta) from the Microsoft Site. Alternatively, you can download the installer file directly from here. Remember you can’t install Windows Media Player 11.0 if service pack 2.0 is not installed in your operating system.

  2. Extract the downloaded Windows Media Player setup file (wmp11-windowsxp-x86-enu.exe) using WinRAR to a directory (wmp11-windowsxp-x86-enu). Now make sure you have a LegitLibM.dll” file in the extracted “wmp11-windowsxp-x86-enu” folder.

  3. Download the patched LegitLibM.dll and then copy-paste it to the “wmp11-windowsxp-x86-enu” folder and click yes when asked to overwrite.

  4. Now run “setup_wm.exe” file in the “wmp11-windowsxp-x86-enu” folder.


  5. Restart your PC, then run your Windows Media Player and you are done!!!